Thursday, September 29, 2011
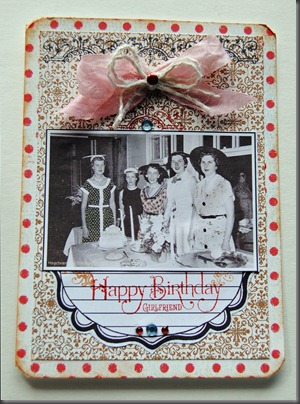
Happy Birthday Girlfriend!
Hello friends! It’s another fun week with the Crafty Secrets Group over at Splitcoast Stampers. The challenge is easy and it’s all about celebrating our Girlfriends! I decided to make a Happy Birthday, Girlfriend card. The papers are from the “Creating With Vintage Patterns” CD. The image is from “Girlfriend’s Images and Journal Notes Booklet. Stamps are also Crafty Secrets.


Wednesday, September 28, 2011
Joy with Heartfelt Creations
Hello friends! The Heartfelt Creations Design Team has some beautiful creations this week on the blog. Seriously, will all the new releases of stamps and diecuts, it's fun to work with these products each week!

Heartfelt Creations Products Used:

Heartfelt Creations Products Used:
HCPC 3419 Holiday Poinsettia Candle PreCut Set
HCD 710
Other supplies:
Wonder Collection Papers (Authentique), 6" metal frame piece, foam board,Perma Tac and Hot Glue Gun and Glue Sticks (Glue Arts), Antique Linen Distress Ink (Ranger), Glittered Paper (Robin's Nest), Poinsettia leaf, Ribbon (May Arts), Mini foam glitter balls.
Instructions:
Start with 4" JOY letters and cut patterned paper to cover the letters. Cover a 2" x 8" piece of foam board with the patterned paper. Die cut HCD 710 and adhere to the back of the letter "O". Adhere the JOY letters to the foam board. Stamp Silent Night and distress the edges and adhere to the left side of the "O". Stamp poinsettia's on glittered paper and layer with dimensional foam. Cut three poinsettia's and adhere two under the poinsettia, to the right of the "O". Adhere the other poinsettia leaf to the bottom of the foam board, just above the frame piece. Add three foam glitter balls to this leaf. Tie a ribbon around the letter "Y". Slide the foam board and covered letters into the metal frame piece.
Sunday, September 25, 2011
A Window To My Heart and Soul
I've been having some fun with Basically Bare . I’m sharing a project that was made using a vintage barn window. For safety purposes, I removed the broken glass that was in the frame and replaced it with some plexi glass. I gave the plexi glass a good whack with a hammer and PRESTO..new broken glass. LOL! I’ve used Bottle caps and a canvas heart, both by Basically Bare. The flowers are made with Core-dinations Cardstock.
Saturday, September 24, 2011
Glue Arts and Scor-Pal
Glue Arts and Scor-Pal have teamed up and the Glue Arts Design Team has some fun projects on the blog! I made a Star Album and have included a tutorial for you.
5.5" x 5.5" Star Album
Supplies:
Glue Glider Pro and Perma Tac, Glue Gun and Glue Sticks (Glue Arts). ScorPal, All About Me paper and embellishments (Webster's Pages), Medium Belgium Blue ColorMates (Worldwin), Red Chalk Ink, (Colorbox), Sheer Balck ribbon (May Arts), beads from old jewelry, chipboard


Instructions:
1. You'll need to cut (6) 5.75" x 11.5"solid cardstock.

(6) 5.75" x 8" print

(2) 6" x 6" print

(2) 5.75" x 5.75" print for the front and back cover.
(2) 5" x 5" pieces of chipboard. (These will be covered with the 6" x 6" print to make a center panel on the front and back of the album.

2.) Using ScorPal, score the 5.75" x 11" solids at 5.75". Score the 5.75" x 8" print at 4".


3.)Using Perma Tac and one solid and one print, adhere the ends together. Repeat this on the other 5 sets.


Use Perma Tac and adhere all these pages back to back.
4.) Using Glue Glider Pro and Perma Tac, adhere the 6" x 6" piece of print to the 5"x 5" pieces of chipboard. Fold edges over and adhere.


5.) Adhere the 5.75" x 5.75" print to the solid front and back covers.
6.) Adhere an 8" piece of ribbon to the back side of the chipboard.
7.) Center the covered chipboard and adhere to the center of the cover. Repeat this for the back.
8.) Decorate the cover and inner pages as desired.


5.) Using red ink, ink around the edges of the covered chipboard pieces.
5.5" x 5.5" Star Album
Supplies:
Glue Glider Pro and Perma Tac, Glue Gun and Glue Sticks (Glue Arts). ScorPal, All About Me paper and embellishments (Webster's Pages), Medium Belgium Blue ColorMates (Worldwin), Red Chalk Ink, (Colorbox), Sheer Balck ribbon (May Arts), beads from old jewelry, chipboard


Instructions:
1. You'll need to cut (6) 5.75" x 11.5"solid cardstock.

(6) 5.75" x 8" print

(2) 6" x 6" print

(2) 5.75" x 5.75" print for the front and back cover.
(2) 5" x 5" pieces of chipboard. (These will be covered with the 6" x 6" print to make a center panel on the front and back of the album.

2.) Using ScorPal, score the 5.75" x 11" solids at 5.75". Score the 5.75" x 8" print at 4".


3.)Using Perma Tac and one solid and one print, adhere the ends together. Repeat this on the other 5 sets.


Use Perma Tac and adhere all these pages back to back.
4.) Using Glue Glider Pro and Perma Tac, adhere the 6" x 6" piece of print to the 5"x 5" pieces of chipboard. Fold edges over and adhere.


5.) Adhere the 5.75" x 5.75" print to the solid front and back covers.
6.) Adhere an 8" piece of ribbon to the back side of the chipboard.
7.) Center the covered chipboard and adhere to the center of the cover. Repeat this for the back.

8.) Decorate the cover and inner pages as desired.


5.) Using red ink, ink around the edges of the covered chipboard pieces.
Friday, September 23, 2011
It's A Beautiful Day In The Neighborhood
Hi friends! Boy did I come home to some Happy Mail today! A surprise publication in "Just Cards" Autumn 2011 Issue. My card made using two Crafty Secrets Stamps is on page 108.
"Three Chix Thanks" page 108
AND in "Jewelry Affaire" (A Stampington Publication)
"Days Gone By" Lace Collar
Page 136
Thursday, September 22, 2011
Crafty Secrets Challenge at Splitcoast Stampers
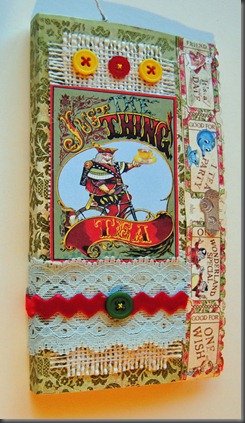
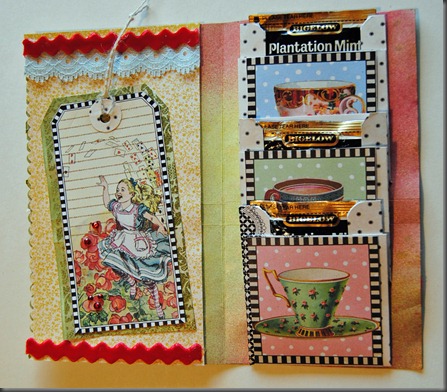
Hello friends! Won’t you join in on a fun challenge over at Splitcoast, Crafty Secrets Group? Joanne has challenged us to “Over The Rainbow”! It’s all about Alice in Wonderland and I’ve used Wonderland Tea Creative Scraps by Crafty Secrets. I spotted this cute little card design over at The Kraft Outlet Blog where Tracy MacDonald shared a tutorial! This is a perfect card and gift all wrapped up in one 


Wednesday, September 21, 2011
A Vintage Christmas with Heartfelt Creations
Christmas Decor: Vintage Style
Heartfelt Creations Design Team has been busy preparing some more beauty for your eyes! Check out the blog for some inspiration. All the products are available in the shop!


Heartfelt Creations Products Used:
HCPC 3421 Dove of Peace PreCut Set, HCD Bell Die
Other products: Felt, needle and thread, Beaded Trim (Hobby Lobby) Cord, (May Arts), Honey Dew Glimmer Mist (Tattered Angels), London Fog ink (Memento), Mica Flakes (Melissa Francis), Vintage crochet. Fiber Fill, Hot Glue Gun and Melt Sticks (Glue Arts)
Directions:
Using felt, diecut two bells. Make a hanger using silver cord, knotting the loose ends. Place the cord in between the bells. Place a small piece of fiber fill in between the two pieces and hand stitch around the bells. Cut a piece of beaded trim and hot glue the trim in place.
For the stocking: Stamp the sentiment, mist with glimmer mist and add some mica flakes to the edges. Adhere vintage crochet under the over turned part of the stocking. Hot Glue the sentiment in place.
Tuesday, September 20, 2011
Hop on the Halloween Bus and Take a Ride To Quirky Crafts
Hello friends! Caro over at Quirky Crafts has a fun challenge, ABC (Anything But A Card). I altered a little bus I bought at out Dollar Store and it's all dressed up for Halloween! Hop on a have a ride...free, of course :)
All the papers and images are Crafty Secrets. You have until Friday if you like to join in the fun at Quirky Crafts! I'm sharing a picture of the bus before it was altered, too!
All the papers and images are Crafty Secrets. You have until Friday if you like to join in the fun at Quirky Crafts! I'm sharing a picture of the bus before it was altered, too!
Monday, September 19, 2011
Retro Inspiration Challenge with Crafty Secrets
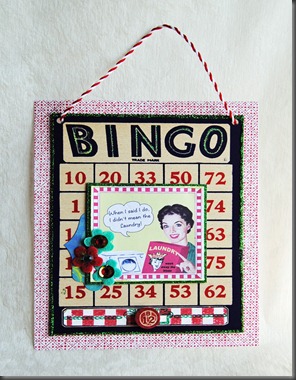
Hello friends! Today were having a lot of fun and creating retro art! This was a challenge for me because I tend to think of retro as vintage. LOL! Check out all the fun inspiration on the Heartwarming Vintage blog! The Design Team has some great samples for you viewing pleasure and you can click on their name and it will take you to their blog!
Vicki Chrisman
Pam Hooten
Heidi Blankenship
Michele Kovack
Linda Duke
Julie Campbell
Amy Teets
Debbie Marcinkiewicz
Fauve van Maanen
Gini Cagle
Jan (here)
Tammy Roberts
Victoria Warren-Mear
Viola Mahr
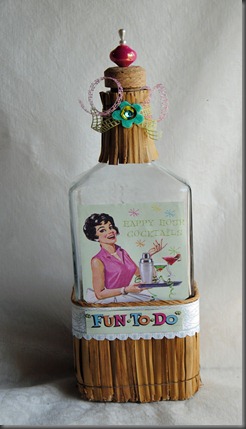
Retro bottle with the bright and beautiful!
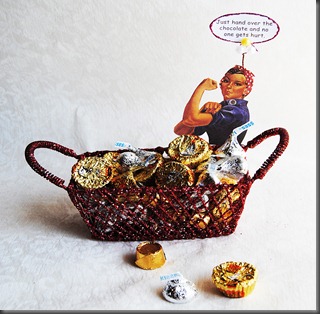
A little chocolate, please!
I've used images from Crafty Secrets Image and Journal Notes. The paper are from "Creating With Vintage Patterns" CD. All the products can be found at Crafty Secrets on the Shopatron site.

Vicki Chrisman
Pam Hooten
Heidi Blankenship
Michele Kovack
Linda Duke
Julie Campbell
Amy Teets
Debbie Marcinkiewicz
Fauve van Maanen
Gini Cagle
Jan (here)
Tammy Roberts
Victoria Warren-Mear
Viola Mahr
Retro bottle with the bright and beautiful!

A little chocolate, please!

I've used images from Crafty Secrets Image and Journal Notes. The paper are from "Creating With Vintage Patterns" CD. All the products can be found at Crafty Secrets on the Shopatron site.
Sunday, September 18, 2011
Vintage Bottles
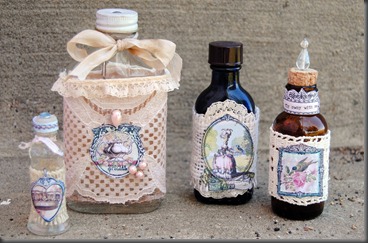
Hello friends! I have a thing for little bottles and it started at a very young age. My Dad was a heavy equipment operator and often used a crane to dig and demolish large buildings. He would bring home the cutest little bottles that had been unearthed after many years of being buried. Mom would add them to her growing collection and once I was old enough, she shared some of them with me. I still look for little bottles when I’m shopping at boutiques, thrift stores and antique shops. These little bottles came from an Antique Shop and when I saw the new Clear Art Mini Frames Stamp by Crafty Secrets, I knew they would be perfect! The blue bottle still had some Tincture of Benzoin in it…being the snoop that I am, I twisted off the lid and gave a hearty sniff…and WOW…the smell about knocked me out! LOL! Check out the Heartwarming Vintage Blog for some more vintage goodness!

Saturday, September 17, 2011
Luggage Album with Robin's Nest
Hello Robin's Nest fans! Today I'm sharing a Luggage Album that's sure to keep all your important documents safe! Perfect to store your postcards, receipts and other memorabilia! I used packing that some diecuts had come in and traced it onto this beautiful Distressed Honeycomb cardstock. I've used Black Distressed Strip for the side straps. Cut two "Hardware" Diecuts and layer them on top of the side straps. Cowboy Dew Drops make the perfect little buttons on the front. The France stickers work so well for little luggage tags and inner page decor :) Be sure to visit the Chattering Robin's Blog for some inspiration!
Fold
Cut straps.
Diecut Hardware
Glue straps in place.
Glue hardware and trim at the top
Add Dew Drops
I used Sara Binder's for the inner pages.
Use France Stickers for the Luggage Tag and inner pages.
Trace luggage pattern
Score in the centerFold
Cut straps.
Diecut Hardware
Glue straps in place.
Glue hardware and trim at the top
Add Dew Drops
I used Sara Binder's for the inner pages.
Use France Stickers for the Luggage Tag and inner pages.
Friday, September 16, 2011
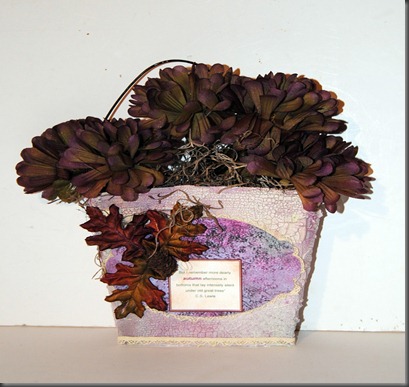
Autumn Bouquet
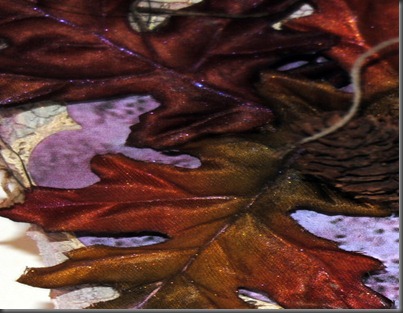
Hello friends! June at DezinaWorld has a beautiful Autumn freebie and challenge today. I love the colors and the overall feel of the image. I decided to make a Fall Bouquet Wall Hanging with the image. I just diecut a portion of the image and added lace around the diecut. I misted leaves and flowers and container with Cranberry, Rust and Olive Vine Glimmer Mist by Tattered Angels. Crackle Medium by Golden was used to get the deep cracks on the surface.



Subscribe to:
Posts (Atom)


