






HomeShoppePublications and ResumeDisclosure


Tuesday, May 22, 2012

Want 2 Scrap Teams Up With Glue Arts

***BIND-IT ALL and O-WIRES GIVEAWAY***
Hello friends!   Welcome to my "filled to the brim" post today.  I have a couple different things going on so you're in for some fun! Be sure to click on my giveaway (above) to see the details of my giveaway.  Glue Arts has teamed up with Want 2 Scrap for some fun hopping :)
Be sure to hop over to both blogs this week cause you'll find so many inspirational projects!


          teams up with


user posted image
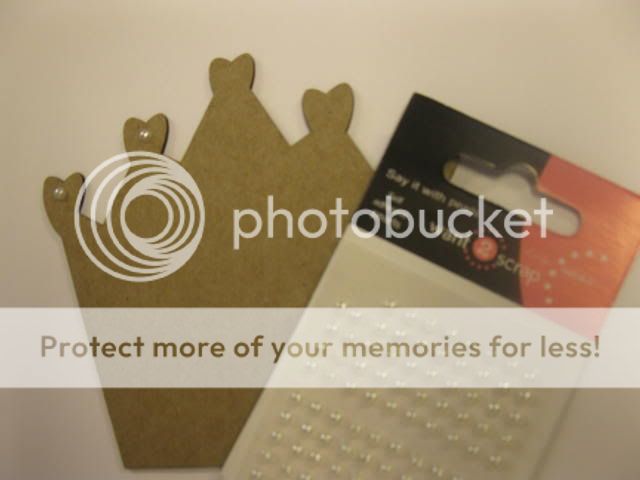
I've used Want 2 Scrap White Pearls on the tips of the crown.
user posted image
I've used Want 2 Scrap, Big Beautiful Bling Borders by Nina Brackett
So easy!  Start with a toilet paper tube.  Using Glue Glider Pro and Perma Tac, adhere a piece of cardstock that's been cut to size.  Using Glue Sticks and a glue gun, glue the bottom of the tube closed.  I've used some wire and pearl beads to make both handles.
Instructions:
Start with a toilet paper tube.
user posted image
Cut paper to cover the tube (4.25" x 6.00").
user posted image
Using Glue Glider Pro and Perma Tac, apply adhesive to your choice of paper. Adhere the paper to the toilet paper tube. Press one end of the tube flat.
Using a sewing machine, sew across the bottom. (You could use a hot glue gun instead). Use the tiny "Say it with pearls: and apply a pearl to each peak on the crown. 
user posted image
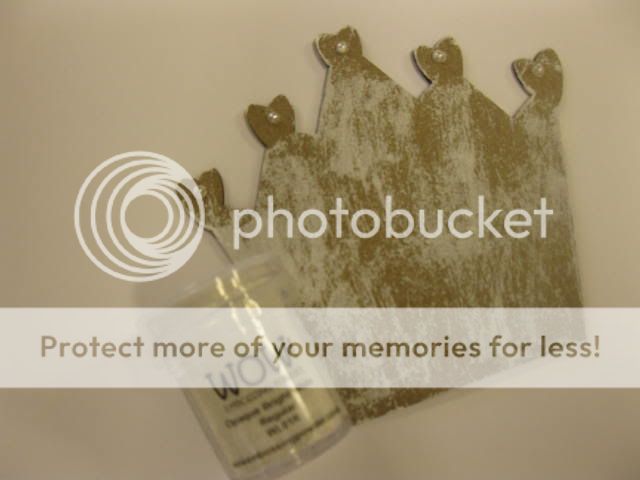
Using a versa mark ink pad, apply ink to random areas of the chipboard crown and then heat emboss with White Embossing Powder.
user posted image
Cut 2 pieces of wire 6" long. 
user posted image
Twist two ends together and the string a bead on the wire, twist the wire several times, and repeat until the wire is beaded and complete. 
Hot glue the crown to the covered toilet paper tube. Hot glue a pin wheel to the center of the crown. Use a hot glue gun to adhere the wire handle. Add sweet treats and crinkled paper to the inside of the tube.

Allie Gower
Dana Gustafson
Jan Hennings
Keri Lee Sereika
Julia Sandvoss
Be sure to leave a comment on the Glue Arts blog as well as Want 2 Scrap blog.  Want 2 Scrap will be giving away a $20.00 certificate each day!

Recycled Toilet Paper Tubes: Inspired by Pinterest
Sweet Treats
Supplies:
Glue Gun and Glue Sticks. Glue Glider pro and Perma Tac Adhesive (Glue Arts), Dear Lizzy Paper Line, Pin Wheel Embellishment (American Crafts), Beautiful Bling Borders, Say it with Pearls, Chipboard Crown (Want2Scrap), White Embossing Powder (Wow), Heat Embossing Tool, Toilet Paper Tubes, wire and pearl beads (Hobby Lobby), Trinket Pins (Maya Road), Crinkled paper (for the inside), Uline, White lace (Really Reasonable Ribbon)


Here's a peek at what coming on Thursday!  Wow Embossing Powders and Paper Crafter's Library are bringing you several projects and embossing techniques!  It all started on Monday so be sure to take a peek :)  I'll show you how to emboss on metal!  Here's a sneak peak.

Monday, May 21, 2012

Living In A Bubble: Steampunk Style


Hello friends!  This is my first post as a member of Hobby Baby Design Team.  I'm so excited to be part of this team and have an opportunity to work with these amazing products!  The Globes are so much fun to work with and they can be used in altered art projects as well as framed projects. The NEW chipboard gears were the perfect size for the head trinket.  I heat embossed the gears with Micro Copper Powder.   Globecraft Memories is generously offering 25% off your entire purchase!  Use coupon code TS25.
I started with a cardboard birdhouse.
Use the Oval Frame as a template and cut an oval in the front of the house.
Paint the house, base and the head with black acrylic paint.
Paint the spigot knob and roof with copper acrylic paint.  Let dry.
Heat emboss random areas of the knob using copper powder.
Heat emboss the chipboard gears.
Ink chipboard frame and stamp script.
Using Crop-a-dile, punch holes in the center and insert a battery operated tea light.
Glue the tea light in place.  
Glue metal gears and chipboard gears to head trinket.  Glue over the tea light.  Glue the Globe over the head trinket.
Using Glastique, adhere a beaded chain around the outer edge of the globe.
Add corsage pins, charms and chain to the base.
Insert the spigot knob in the base of the house.
Using glue for metal, adhere clock parts and gadgets to the house.
Make Steampunk words for the roof.
Glue into place on the roof
I painted coffee stir stick with black and copper acrylic paint.  I added silver rings to the stirs and glues them to the house.  Black on the roof and copper on the house.

Glue sticks to the roof and house using a Quick Dry Adhesive.
Hope you have enjoyed my "Living In A Bubble: Steampunk Style" Project.  If you have any questions, please feel free to contact me.

Thursday, May 17, 2012

Crafty Secrets and Heartwarming Vintage: Creating With Vintage Typography CD 3

***BIND-IT ALL and O-WIRES GIVEAWAY***

Hello friends :) Yesterday I had some time to play and decided to grab my beautiful Crafty Secrets!  WOW!  I hadn't seen the images on this Creating With Vintage Typography CD until yesterday and it was love at first sight!  LOL :)  The CD will be available to ship on May 25th.
Here's a second card.  A friend of mine is making Deviled Eggs for my Son's Graduation party tomorrow night.  I made this to give her a sweet little 'egg related' thank you :)
Inside...love the Daily Egg Record :)
Tomorrow night will be our Son's Graduation party and Sunday will be the Graduation Ceremony so it's going to be a busy few days.


Tuesday, May 15, 2012

Love My Tapes: Birthday Challenge

Scroll down for the Bind-It All and OWire GIVEAWAY!
Hello friends!  I happened to see a new Design Team Call for Love My Tapes.  WOW!  They do have some beautiful tapes including lace tape, fabric tape, glass tape and washi tape.  You'll have to hop on over here to read the details of the call.

I see one of the requirements is to have one of the projects be a Layout.  SO..I won't be trying out for the call. As you know, I have an altered and mixed media heart so that's where my passion is :)

While visiting Love My Tapes blog, I saw they had a challenge...BIRTHDAY!  I decided to make a card using Dear Lizzy papers by American Crafts.  My Happy Birthday stamp is Crafty Secrets and the tape is K and Company.

Monday, May 14, 2012

Glory Mini Album With Authentique: Sketch Challenge

***Bind-It All and Owires GIVEAWAY ***

Hello friends!  I decided to play along with the sketch challenge over at Authentique.  Love the little chunky mini and your can hop right on over to visit Laura at "The Paper Trail".  She has amazing tutorials and this mini is called "Stack the Deck"!
Here's the May Authentique sketch challenge.  I flipped the sketch and grabbed some of the beautiful "Glory" collection.

Cover
Mini has 12 diecut cards for photo's or journaling.  Die is Spellbinder's Poinsettia/Star


Sunday, May 13, 2012

Bind-It All Giveaway and Happy Mother's Day

Hello friends!  Wishing all of the Mom's a Happy Mother's Day :)  Hubby is taking me out to breakfast this morning to celebrate...no kiddo's..just me and hubby!  I especially want to wish my sweet mama a Happy Mother's Day.  She's my best friend and I love her dearly.  The picture was taken a few months ago just before we headed out to watch the boys wrestle :)
Now for a GIVEAWAY!
Every year I've blogged I have given away a Bind-It All...it was 3 years in December so I thought I had better get on the stick :)  I do love my BIA and use it fairly often and it seems to be a popular giveaway.  One lucky person will get a Bind-It All on June 3rd!  (I purchased the BIA at Hobby Lobby and I'm in no way connected to Zutter Innovative). I'll also include 3 boxes of  Owires :)
Zutter - Bind It All - Binding System Version 2

So, here's the scoop!  I will choose ONE of my followers on June 3rd!  Easy as that :)  Good luck to all!


Friday, May 4, 2012

Hello Peeps!

Hello friends :)  Seems like it's been awhile since I blogged.  It's been busy getting ready for our Son's Graduation.  I can tell you, I've been taking some time to create and today I worked on a couple of Altered Energy Drink Cans...gotta keep them hid for awhile though :)
Have you ever visited Retro Cafe Art?  Well, I hadn't until awhile ago when I discovered they sold the shines that I like to alter.  So, while visiting I went on to snoop through their digital images and bought a couple sheets.
The image I've used on my altered toy blocks is a design by Debrina Pratt.
These little votive holders were on sale at Hobby Lobby and I got them for $ .40!  Of course, I had to alter it right away and flip it upside down and add a crystal to the top.