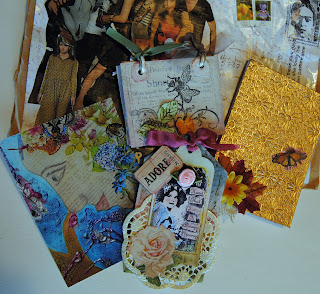
Hello friends! I Have some super exciting news to share. Really Reasonable Ribbon has announced the new Design Team. Check out the list and I’m sure you’ll see some familiar names of some awesome designers! Am I the luckiest girl ever??? I’ve was notified awhile ago but had to keep it hush, hush! That’s always the hardest part, huh? LOL! It just wouldn’t be right to post this without including a project I made using RRR so here’s a keepsake box. I used Seam Binding Log Brown and White Wrinkled Ribbon. The door plate, knob and little bird nest have been hand molded and cast with resin. I painted the box and knob with Glimmer Glam and misted the doorplate with Glimmer Mist.
Really Reasonable Ribbon Design Team 11-2011 to 4-2012
Main design team
Cheryl (returning) -http://sweeetdesignsbycheryl.blogspot.com/
Misty (returning) - http://mommyof5kidz.blogspot.com/
Judy - http://www.jarfullofjoy.blogspot.com/
Dawn - http://www.dawnscraft.com/
Joanna - http://scrap-making.blogspot.com/
Jan - http://papercraftpleasures.blogspot.com/
Emily - http://createserendipity.blogspot.com/
Corri - http://www.buglvr.blogspot.com/
Special Event design team
Trudy (returning) - http://truesgiftsfromtheheart.blogspot.com/
Jeanne (returning) - http://inkypaws.blogs.splitcoaststampers.com/
Heidi - http://embellished-dreams.blogspot.com/
Gloria - http://www.gloriascraps.blogspot.com/
Here’s the products I used:
Really Reasonable Ribbon White Wrinkled Ribbon, Seam Binding Log Brown
Basically Bare Fanciful Frames
Angels Tattered Stiletto Black and Hayride Glimmer Glam, Hula Hoop, Black Magic and Olive Vine Glimmer Mist
Graphic 45 Le Romantique Collection
Prima Flowers
Tim Holtz (Hardware Legs)
Amazing Mold Putty (mold putty and resin)
Sunday, October 30, 2011
Saturday, October 29, 2011
Glue Arts and Webster's Pages
Hello friends! Today Glue Arts and Webster's Pages are teaming up! I did a couple projects with the Webster's pages line, "All About Me". Don't you love the soft color palette and the shabby chic feel? The first project started as a house (by Doodlebug Designs) and ended up a Birdhouse on a spool. I got the 4" vintage spool at an antique shoppe and it seemed to work well with the size of the house.
The second project is a double pane frame and was made for our Design Team Coordinator, Julia. This is a picture of her and her hubby on vacation! Check out the Glue Arts blog for some fun projects!
Instructions for the Birdhouse:
1.) Start with All About Me papers and house template.
2.) Mist the house with Caribbean Glimmer Mist.
3.) Cover the house per the instructions.
4.) Use Hula Hoop and Caribbean Glimmer Mist and mist the skewer.
5.) Hot glue one end of the red and white twine, spin on the skewer and hot glue the other end.
7.) Poke a hole through the center top of the house and insert skewer.
8.) Using Perma Tac, cover a 4" vintage spool.
http://s370.photobucket.com/albums/oo148/momof7_photos/
9.) Insert skewer into spool and hot glue.
10.) Add cardstock stickers to the door.
11.) Cut (4) 1" x 6" strips of paper, score down the center and used scalloped scissors on one edge. Use Perma Tac to adhere to the edge to the roof.
12.) Hot Glue pom-poms to the bottom of the house.
13.) Hot Glue flowers on the house and spool.
14.) Hot Glue a green baed and canvas ticket to the top of the skewer.
Products Used:
Glue Gun, Glue Sticks, Glue Glider Pro and Perma Tac (Glue Arts)
All About Me paper and embellishments (Webster's Pages)
Chipboard House (Doodlebug Designs)
Glimmer Mist (Tattered Angels)
Twine and pom-pom's (May Arts)
Hardware Cardstock Stickers (Crafty Secrets)
Greenry (Prima)
skewer
ScorPal
vintage spool
8.) Using Perma Tac, cover a 4" vintage spool.
9.) Insert skewer into spool and hot glue on the inside top and the inside of the bottom of the spool.
10.) Add hardware stickers for the door and knob.
11.) Cut (4) 1" x 6" strips, score in the center. Fold in half. Using Perma Tac, add to the outside of the house for trim.
12.) Hot Glue pom-poms to the bottom of the house.
13.) Hot Glue greenery and flowers on the house and spool.
14.) Hot Glue a green bead to the top of the skewer. Hot Glue canvas under the bead.
The second project is a double pane frame and was made for our Design Team Coordinator, Julia. This is a picture of her and her hubby on vacation! Check out the Glue Arts blog for some fun projects!
Julia and her Hubby
Instructions for the Birdhouse:
1.) Start with All About Me papers and house template.
2.) Mist the house with Caribbean Glimmer Mist.
3.) Cover the house per the instructions.
4.) Use Hula Hoop and Caribbean Glimmer Mist and mist the skewer.
5.) Hot glue one end of the red and white twine, spin on the skewer and hot glue the other end.
7.) Poke a hole through the center top of the house and insert skewer.
8.) Using Perma Tac, cover a 4" vintage spool.
http://s370.photobucket.com/albums/oo148/momof7_photos/
9.) Insert skewer into spool and hot glue.
10.) Add cardstock stickers to the door.
11.) Cut (4) 1" x 6" strips of paper, score down the center and used scalloped scissors on one edge. Use Perma Tac to adhere to the edge to the roof.
12.) Hot Glue pom-poms to the bottom of the house.
13.) Hot Glue flowers on the house and spool.
14.) Hot Glue a green baed and canvas ticket to the top of the skewer.
Products Used:
Glue Gun, Glue Sticks, Glue Glider Pro and Perma Tac (Glue Arts)
All About Me paper and embellishments (Webster's Pages)
Chipboard House (Doodlebug Designs)
Glimmer Mist (Tattered Angels)
Twine and pom-pom's (May Arts)
Hardware Cardstock Stickers (Crafty Secrets)
Greenry (Prima)
skewer
ScorPal
vintage spool
8.) Using Perma Tac, cover a 4" vintage spool.
9.) Insert skewer into spool and hot glue on the inside top and the inside of the bottom of the spool.
10.) Add hardware stickers for the door and knob.
11.) Cut (4) 1" x 6" strips, score in the center. Fold in half. Using Perma Tac, add to the outside of the house for trim.
12.) Hot Glue pom-poms to the bottom of the house.
13.) Hot Glue greenery and flowers on the house and spool.
14.) Hot Glue a green bead to the top of the skewer. Hot Glue canvas under the bead.
Tuesday, October 25, 2011
Kraft Outlet Anything Goes Challenge: Quote Journal
Hello friends!! I placed my first order with Kraft Outlet and thought these little journals were so sweet. Because I enjoy quotes, there are rub-on quotes by Quick Quotes on some of the pages. There are plenty of blank pages to add quotes as I collect them. The beautiful image on the front is Crafty Secrets and do you see the 1800’s dictionary page in the background?
Right now Kraft Outlet is having a giveaway. Just grab some of your Kraft Outlet goodies and make whatever your heart desires fort the Make It Monday Challenge. Someone will win a $15.00 gift voucher! The designers have some cute projects on the blog if you’re in need of some inspiration.
Products used:
Mini Lunch Bag Kraft (Kraft Outlet)
#526 Natural Crinkle Journal Small (Kraft Outlet)
#939 Small Glassine Bag (Kraft Outlet)
136 Memo Pins (Kraft Outlet)
Ribbon, lace and tear drop gem (making memories)
Bird Image, Birds and Blossoms Creative Scraps (Crafty Secrets)
Aqua/White Baker’s Twine (RRR)
Blue lace
Quotes (Quick Quotes)
And..I think I figured out the challenge over at Splitcoast Stampers where Marcy is the host. If I'm right, it's to make a tag! LOL..if not, I had fun making the tag anway :)
I used my Accucut Shadowbox Die and cut out the center panels. Sewed the two sides together to make a tag. I kept the top open so a gift card could easily be tucked inside. Paper is Authentique and the sweet image is Crafty Secrets. Baker's Twine is Really Reasonable Ribbon.
Labels
Accucut,
Challenge,
Crafty Secrets,
Kraft Outlet,
making memories,
Quick Quotes,
RRR
Sunday, October 23, 2011
Follow Your Heart
Hello friends! I’ve been playing with canvas. mists and glass bead medium. The message on the canvas is so inspiring.
follow your heart
believe in your dreams
and create your own reality
close up of glass beads
Here’s what I used:
Glass Bead Gel Medium (Golden)
Caribbean Blue, Vintage Pink, Black Magic Glimmer Mist, Twinkle Toes Glimmer Glam (Tattered Angels)
lace, flowers and dress form (Prima)
Iron–on (Donna Downey)
Black Tulle
8” x 10” canvas
frame
Friday, October 21, 2011
A Halloween Collar
Hello friends! Here’s a fun Halloween Collar just right for your Halloween outings. I’ve used a Prima fabric and rhinestone piece for the main collar. I’ve added some crystals, beads and a Crafty Secrets image. Now that the kiddo’s are older there is no Trick-or-Treating and hubby and I usually stay home. Tonight we have a surprise party for a friend that is turning 40..so maybe I could wear my festive piece! How do you celebrate Halloween?
Thursday, October 20, 2011
Humpty Dumpty Sat On A Wall
But Humpty Dumpty didn't have a great fall...cause I caught him just in time! LOL! I bought this wooden box on clearance at Hobby Lobby for $1.20! I painted it with Gray paint and the used Molding Paste to hold the bricks in place. I gave it a misting with Sugar Maple Glimmer Mist. The words on the front were printed on the computer and then glued to the front of the bricks. I love the Climbing Ivy Set (#Es007VR) byBasically Bare and gave that a misting with Olive Vine and then sewed through the center of the leaves. Bricks are misted with Brick and Sugar Maple Glimmer Mist.Check out the Basically Bare Blog for some fun and inspirational projects!
Products:
Glimmer Mist (Tattered Angels)
Paint and Molding Paste (Golden)
Wooden Box
Stack-a-Bellies Birds (Basically Bare)
Computer
sewing machine
Tuesday, October 18, 2011
Halloween Glove Found Digging Around In The Graveyard!
Sunday, October 16, 2011
Butterflies Are Free Album
Hello friends! I had so much fun making this album..so many fun techniques using Golden products. I’ve used the Glass Bead Gel Medium and Molding paste. There are several different techniques in the album including using Molding Paste and Glass Bead Gel. Glimmer Mist colors the pages of an album made using recycled corrugated cardboard. The beautiful "Fancy Butterfly" is Viva Las Vegastamps! and I love the fine detail of this stamp! I've used Robin's Nest Dew Drops (dd-143 Cotton Candy) and Aqua Velvet Ric-Rac as a border. The newspaper borders are made by tearing strips of newspaper and then crinkling them up, straightening them back out and adhereing with glue. Be sure to check out the Chattering Robin’s blog!
close up
Pages
Saturday, October 15, 2011
All Dressed Up With No Place To Go
Hello friends :) This sweet little dress really does have a place to go as she stands in our bedroom and keeps a watchful eye on any activity! OK..she has no eyes which is probably ok. It might be a little freaky if she did...LOL! I made her using strips of newspaper, water and flour, Black Magic Glimmer Mist, Twinkle Toes Glimmer Glam by Tattered Angels. May Arts Ribbon and bead trim. The crystals are Prima. It's all held together with Glue Arts Ribbon Adhesive and Hot Glue Gun and Glue Sticks! The dress is full size and stands about 3' tall.
AND
My sweet friend from Germany, Valerie, sent me these beautiful gifts in the mail. Aren't they beautiful? Thank you and I love 'em all! She is an amazing Artist and makes the most beautiful Journals!
Labels
altered,
Dress Form,
Glue Arts,
May Arts,
Prima,
Tattered Angels
Friday, October 14, 2011
When Opportunity Knocks, Answer The Door
Hello friends! This is my first post as a member of Amazing Mold Putty Design Team. I must say, I'm hooked. Being an Altered/Mixed Media Artist and like to use door plates and knobs on my projects and the best thing is, now I can make my own. I can get the exact color and texture I want for my projects. Be sure to visit Amazing Mold Putty blog to see some fun ideas using this putty! You can purchase these great products HERE!
18" x 18" Altered Frame/Home Decor
here's a close up of the door plate/knob
I love the detail!
Close up of flowers
Here's some of the steps!
Gather knob and doorplate
Mix Mold Putty according to instructions. And mold the knob and door plate.
door plate
Mix Amazing Clear Cast according to instructions and pour into the knob mold.
Let stand overnight and remove.
Remove doorplate from mold and fill mold with Amazing Casting Resin.
Let cure and remove from mold.
I left my knob clear and painted the doorplate using Spectra Amber paint. I them wiped the plate with Gesso and rubbed off the excess. After I removed most of the Gesso, I inked the plate with Tuxedo Black Memento Ink.
After achieving the look you want, hot glue the knob into place. Mist with Suede Glimmer Mist.
I diecut several flowers using recycled corrugated cardboard and misted the with different shades of Glimmer Mist. I then hot glued resin and buttons in the center. I then hot glued a glittered pick to the main corrugated cardboard that would be the back of the frame.
I printed my quote and distressed a bit with ink and misted with Glimmer Mist. I used stencils and misted the corrugated cardboard. I used some Amber Paint to paint the frame. I hot glued all pieces into place.
Subscribe to:
Posts (Atom)