HomeShoppePublications and ResumeDisclosure


Saturday, April 28, 2012

Hobby Baby Design Team

Hello friends!  Remember I applied for Hobby Baby Design Team?  Well, the great news is they picked me and several talented artists to join the team.  I'd like to invite you to join the BLOG and Facebook.

Have you had a chance to check out the products at Globecraft Memories?  I love the Bubble Frames!  I see so many possibilities with these.

Check out the {OH SO} AWESOME Steampunk collection.

I'm so excited to get to work with these products and so many more.  They not only have the Bubble Frames, but Ornaments, Hanging Bubble Frames, Assembly Supplies, Steampunk, Brag Books and Piccolo. (Which is powders, card making goods and glitters). Look at the chipboard decor that's ready for your card making needs.  So many to choose from :)

Wednesday, April 25, 2012

Shabby Chic On A Pedestal

Hello friends.  Today is  my last post as a Really Reasonable Ribbon Design Team member. With summer just around the corner and a calendar filled with family fun, I thought it would be best to step down as a DT member. Bonnie has been great and I'd like to thank her for all she's done :) Always so supportive and sweet :)
The top piece is a crackeled votive holder that I've turned upside down and put an image inside.
Top

Sunday, April 22, 2012

Stampers' Sampler Publication and Catching UP!

Hello friends.  Hope you're all doing well and have had some time to do what you love!  I haven't had as much time in my craft room because we've been spending a lot of time outside.  After the storm in July we had so many buildings, bins, house and tree damage...we find ourselves still picking up the pieces.
Here's a picture we took last May after painting the buildings (Remember we were getting ready for our Daughter's graduation).
029
This year our Son is graduating so we're trying to catch up and clean up!
After the storm.
Picture of the house just as it is getting light and we can see the damage.  Needed to get a tarp to cover the roof which was half gone.
Bringing in the big boys
Barn and Corn Crib...the last of them
As the barn came down, this sweet pigeon wouldn't fly away.  They stopped the demolition and set her in the grass.  Because we have several cats, we brought her in the house and she couldn't fly.  She spent 4 days in the house in a box.  She had quite the appetite and enjoyed her bird food and water.  We have moved her out to the garage and she is starting to fly and can get up about 5 feet.  We'll continue to take care of her for awhile and if she isn't able to fly away, we'll call the DNR and she may be able to have a home in one of the parks where they have enclosed housing for birds.
We'll head out today to do some more work :)
Speaking of catching up, I have a published piece in "stampers' sampler", catch up issue.  You can find it on page 124 :)


Friday, April 20, 2012

Quick Quotes April Kit: Endless Possibilities

Hello friends!  I'm working (or should I say playing) with the Club Q this month.  There are so many products in this kit including diecuts, papers, colored vellum, flowers, trims and ribbons!

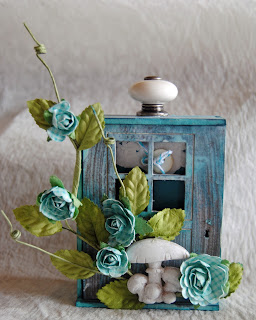
Today I'm sharing a Shabby Chic Shrine with a Mini Accordion Album.  The shrine is by Coffee Break Design and is available at Retro Cafe Art.  I started by "white washing" the shine kit pieces with white Gesso.  Once dry, I've used Baja Blue, Powder Puff Chalking Ink on the surface.  This really gives this piece a nice shabby chic/vintage feel.  The knob is by Tim Holtz, Idea-ology.  The Mini Accordion Album is made using Club Q Kit.  Flowers and mushrooms are Prima.
A friend sent me this old script Album and the papers in the kit go so well together.  Using Baja Blue and Mocha Mama Powder Puff Chalking ink, stamp a  tree and birds.
And a Home Decor Frame using the Club Q kit and Purple Passion, Powder Puff Chalking Ink and the purple lavender gingham ribbon.  Diecuts are included in the kit!
and a simple card.
So far I have made 7 projects with the Club Q Kit!  


Sunday, April 15, 2012

Hobby Baby Design Team


Hello friends!  Not long ago, I saw a Design Team call for "Hobby Baby".  I hopped over to check out their products to see if it might be a good fit for my personal style...and, it sure seems to be!  They have some awesome products and I'd like to get my little hands on several of them :)  You can check out the blog to read the Design Team details.
One of the requirements is to post a project with a tutorial.  I've decided to show you how to make flowers out of foam packaging sheets.  One of the Companies I design for uses these foam sheets in the monthly shipment of product. You know me, I couldn't throw them away!  LOL!
So here's how to make the foam flowers.


Start with foam sheets.
Using Tattered Florals die and Accucut, diecut several flowers.
Using Alcohol Ink (Kuretake) and a paint brush, brush the ink on the foam flowers.
The more ink you add, the darker the color.
Stack and layer the flowers and insert a brad in the center.
After the brad has been added to secure the flower, add drops of alcohol ink to random areas of the flower.
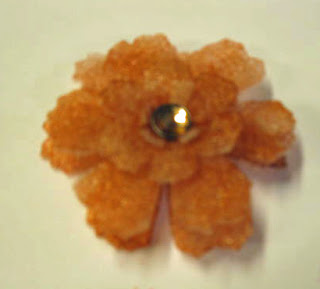
Using a heat embossing tool, heat the petals of the flower.  The foam will curl and melt when heat is applied.


Friday, April 13, 2012

Really Reasonable Ribbon and Rubber Café Blog Hop

Hello friends!  Hope you’re ready for a rip-roarin’ GOOD TIME!  Really Reasonable Ribbon has teamed up with Rubber Cafe and all of the designers have projects that are sure to inspire you!   The hop starts at 7:30 AM EST.   I chose the  “Be Stylish” stamp. Be sure to check out all the blogs for some fun and inspirational projects!   You should be arriving from  Michelle Pearson 


Be Stylish Rubber Stamp from The Rubber Cafe

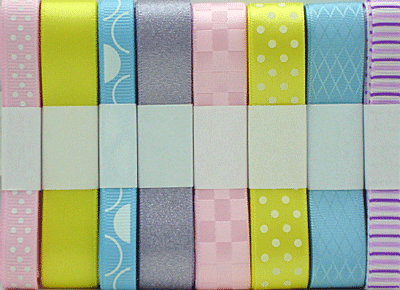
I used Graphic 45 cardstock, 1.5” Jute Ribbon Black and the Yellow Satin from the Club Assortment.   Really Reasonable Ribbon and this beautiful stamp designed by Candy Rosenberg.  Isn’t the sentiment a HOOT?  It makes me giggle when I read it.  I’ve used the Jute Ribbon behind the sentiment.  The sentiment and Corset are heat embossed with Black, WOW embossing powder.
I've used a Yellow Copic Marker and the Yellow Satin Ribbon from the Club Assortment
.
Monthly Ribbon Club, Domestic

Now you'll be hopping over to see Tesa 

The Rubber Cafe Blog - http://blog.therubbercafe.com/


Tuesday, April 10, 2012

Quick Quotes Club Q April Kit

Hello friends!  Jan here to share a few Altered pieces. I'm so excited to working with the April Club Q Kit. I started with the "Dream Big" kit and am amazed how many projects I've been able to make with just a portion of the kit.  WOW,  talk about GREAT value!  I've used Purple Passion and Amaretto Powder Puff Chaliking Ink on the frame and block houses.
Home Decor Frame
I've used the gold ribbon in the kit to make a center for the large fabric flower.  The large flower is fabric and I've used Purple Passion and Amaretto Powder Puff Chalking Ink on the fabric.  Rub the ink on the fabric and give a little mist of water and the ink spreads through the flower petals.
Another Home Decor project.
Love this gem trim!
The third project is a Sweet Treats Tin


Saturday, April 7, 2012

Berry71bleu April Challenge: Mother and Child Artful Kit

Hello friends!  Berry71bleu has their April challenge going on and look at the beautiful inspirational photo.

I love the soft pastels in these pictures.  Wouldn't you like to join in on the challenge?  I can tell you that I received a prize package a couple months ago and a tag from Berry71bleu,  The tags are all beautiful and have so many fine details!  My prize package was amazing and filled to the brim with beautiful pieces from lace trim, buttons, mini boxes, etc.  here's a peek at what I received.
FEBRUARY PRIZE
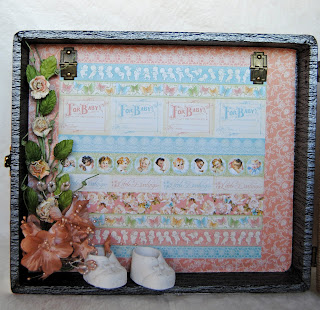
So today, I'm entering my Mother and Child Artful Kit.  A gift that was truly made from the heart with a lot of love :)  It's made using a vintage Projector Case, a recycled clam shell box, test tubes, glitter, buttons, pins and trims and so much more!
Inside left
Right side
Clam Shell Box
Test tubes with buttons and trim
Mini boxes
Inside boxes