Edited to include a much requested tutorial...because you're all so sweet, here ya go :)
Good morning friends! I hope you’re ready for your morning exercise, cause we’ll be hopping from one blog to another! Be sure to write down the secret word on each blog, beginning with the Creative Charms blog. You should be arriving here from Sandra’s blog. My secret word is “from”. After you’ve gather all the words to complete your phrase, email Midori (Midori@creativecharms.com) and you’ll be entered in the Grand Prize Drawing. The winner will receive the Kit of the Month and the Deal of the Month! The giveaway closes at midnight on Sunday, May 1st and the winner will be announced on Monday, May 2nd.
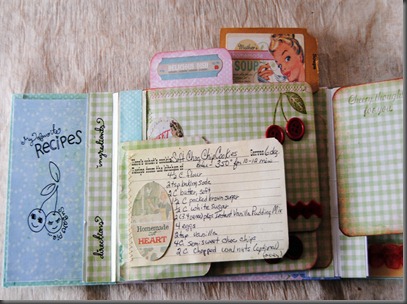
Gatefold Recipe Album using Vintage Brads and a Gingham Butterfly.


 Here’s the sequence of the blog hop.
Creative Charms Blog
Kristal
Amber
Sandra
Jan (you’re here)
Laura
Diane
Jennifer H.
Michelle
Lisa
Chris
Jamie
Amy
Jennifer Y.
Trudy
Ellen
Joscie
Ilene
Midori..email her when you have the phrase :)
Gatefold Recipe Album
Here’s the sequence of the blog hop.
Creative Charms Blog
Kristal
Amber
Sandra
Jan (you’re here)
Laura
Diane
Jennifer H.
Michelle
Lisa
Chris
Jamie
Amy
Jennifer Y.
Trudy
Ellen
Joscie
Ilene
Midori..email her when you have the phrase :)
Gatefold Recipe Album
October Afternoon (Finished size closed 5" x 7")
Step 1- Using corrugated cardboard, Cut (2) 3.50" x 5.00" and (1) 5.00" x 7.00"
Cut the cardstock for the cover.
(1) 6" X 8" (2) 6" X 4.25"
Inner Covers
(1) 4.75" x 6.75" and (2) 4.75" x 3.25")
Inner Pages
(4) 4" x 6" and (4) 3" x 4"
Spines
(2) 5" x 6"
Step 2- Scoring the 5" x 6" spine pieces
Score at 1", 2", 3", 4", 5"
Step 3- Fold and use High Tac adhesive in the valley sections that will face the outside. (the fold used on the spine is called peak and valley).
Step 4- Begin covering your corrugated cardboard pieces. Fold in the raw edges and add a line of Perma Tac. Place inner cover on top.
Repeat this for the 5.00" x 7.00" piece of corrugated cardboard.
Step 6- Adhere the spines to the 5.00" x 7.00" corrugated cardboard. Use the Extreme Tac or Glue to hold securely in place.
Step 7- Using the 3.50" x 5.00" pieces of corrugated cardboard, adhere the spine on the left, now the spine on the right.
Here's the inside of the album.
Step 8- Use Perma Tac to adhere your inner pages as desired.
Step 9- Decorate pages as desired.
Step 10- Decorate cover as desired.
Step 11- I stuck a cardstock sticker on corrugated cardboard. Trimmed the excess.
Step 12- I then hot glued a hand crocheted flower and leaf to the center of the sticker.
Step 13- I hot glued tulle to the back of the cardboard and trimmed the excess.
Step 14- Stick button in the center of the crocheted flower.
Step 15- Apply hot glue to the back of the right side of the cardboard and press in between the two front pieces.
Supplies:
Patterned paper, button, stickers (October AFternoon). Perma Tac, Hot Glue Gun and melt sticks (Glue Arts), score board (Provocraft), Bone Folder (making memories), Round-It All (Zutter), tulle, hand crocheted flower and leaf, recycled corrugated cardboard.